As an Amazon Associate, we earn from qualifying purchases. Some links on this site are affiliate links at no extra cost to you. Our recommendations are based on thorough research and editorial judgment.
Using Portable Monitors as Dedicated Teleprompters for Remote Workers
Portable monitors, ranging from 12 to 15 inches with 1080p resolution, positioned at eye level 12 to 18 inches from your face, effectively eliminate downward gaze during video calls by displaying scripts at camera level. Free software like OBS Studio converts external monitors into teleprompters, while smartphone apps provide wireless control via Bluetooth. DIY setups cost $150–$400, professional systems range $1,500–$5,000, and proper positioning ensures natural eye contact without noticeable movement. Understanding specific workspace requirements, connection protocols, and positioning techniques will greatly enhance your teleprompter effectiveness.
Key Takeaways
- Portable monitors (12-15 inches) positioned at eye level eliminate looking down, enhancing eye contact and professional credibility during video calls.
- Free software like OBS Studio converts portable monitors into teleprompters, requiring only USB-C or HDMI connection and 1080p resolution settings.
- Smartphone apps enable wireless remote control via Bluetooth, allowing real-time script adjustments without interrupting eye contact during presentations.
- DIY teleprompter setups cost $150–$400 using portable monitors and software, significantly cheaper than professional systems costing $1,500–$5,000 minimum.
- Position monitors 12-18 inches from face at eye level, ensuring straight-ahead sight lines and testing placement for natural, unforced eye contact.
Why Teleprompters Improve Eye Contact During Video Calls
Why Teleprompters Improve Eye Contact During Video Calls
Have you ever watched a recording of yourself on a video call and noticed you’re staring down at your screen instead of at the camera? Yeah, that happens to basically everyone who tries to read from a script while on camera.
The problem is simple: your eyes naturally look down at your monitor when you’re reading, which makes it seem like you’re looking away from whoever you’re talking to. Your conversation partner notices this disconnect, even if they can’t quite put their finger on why the interaction feels off.
A portable teleprompter positioned right at camera level fixes this issue. You place the script on an external screen positioned directly behind or next to your camera lens, so you can read while actually looking straight into the lens. No more head-down moments. No more that awkward “distracted” vibe.
Try this: imagine you’re doing a client presentation or a job interview. How much does it matter that you seem fully present and engaged? Frankly, it matters a lot. People pick up on whether you’re actually looking at them or just pretending to. A teleprompter setup means you get to do both—read your talking points and maintain eye contact—without having to memorize everything.
Here’s the trick: the monitor sits at eye level relative to the camera, which creates the optical illusion that you’re looking directly at your viewer. They see genuine attention instead of someone glancing down every few seconds. And that perception difference? It changes how credible and professional you come across.
The best part is you don’t need to stress about memorizing your entire script. You’re free to focus on delivering your message naturally, which actually makes you sound more confident and authentic.
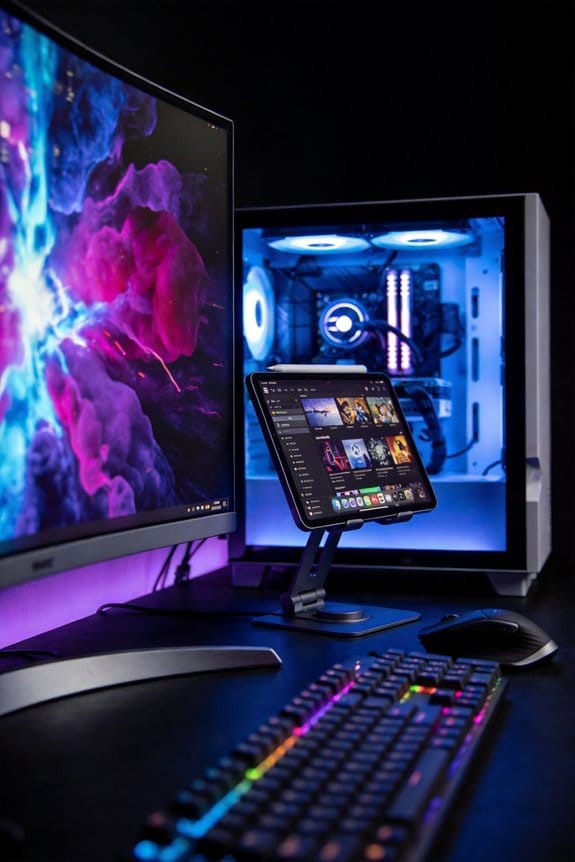
Choose Your Portable Monitor Teleprompter Setup

Want to look people in the eye during video calls without actually staring at your camera? A teleprompter setup might be exactly what you need. The good news is you don’t need to break the bank or buy complicated gear to make this work.
What Size Monitor Should You Get?
Portable monitors range from tiny 7-inch screens to bigger 15.6-inch displays. The real question is: what works for your space and your eyes? A smaller monitor is easier to move around, but you’ll squint to read your script. Go bigger, and you’re carrying more weight. Most people find the sweet spot somewhere in the 12 to 15-inch range.
Resolution vs. Text Size
Here’s the thing—and I mean this honestly—you need to pick your priority. Want sharp, crisp video? Go 4K. Want to actually *see* your words without glasses? Stick with 1080p on a larger screen. You can’t have both at the same time, so think about what matters more to you.
Connection Options
USB-C setups are slick. One cable, and you’re done. If you’re using HDMI, you’ll need adapters and extra cables running everywhere. Try this: check what your laptop and camera already have before you buy anything. You might already own half the stuff you need.
The Neewer X12 II is worth a look if you move your setup around a lot. It goes from box to ready in under fifteen minutes. Not fancy, but practical.
The Budget Reality****
Frankly, you can either buy a dedicated teleprompter monitor or repurpose a regular monitor with some software tricks. Both work. Dedicated gear costs more but looks cleaner. The DIY route saves money but takes more setup time. Either way, your eyes will land closer to the camera, and that’s what people notice on screen.
Set Up OBS as Your Free Teleprompter

Set Up OBS as Your Free Teleprompter
Tired of dropping hundreds of dollars on teleprompter hardware? You don’t have to. OBS Studio is completely free, and it’ll turn any portable monitor into a working teleprompter in about 10 minutes.
Start by setting your OBS video to 1080p for both base and output resolution. This keeps your video quality sharp without eating up your computer’s resources. Next, right-click your OBS preview window and pick Fullscreen Projector—this sends your content straight to that external monitor you’re using.
Here’s the trick: your script needs to read the right way on your end. Use OBS’s transform settings to flip your text vertically or horizontally depending on your setup. Add your main display as a source, fit it to the screen, and apply that flip adjustment. So, why does this matter? Because when your script is mirrored correctly, you can read it naturally without your brain fighting to decode backwards text.
The best part is what happens next. You can scroll through your script smoothly during video calls while keeping your eyes on camera. No awkward pauses. No shuffling papers. Your video stays professional, and you stay in control—all without spending extra money or dealing with complicated equipment.
You’ve basically just built yourself a professional teleprompter setup that cost you nothing. Ready to try it out?
Control Your Teleprompter Script From Your Phone

Ever been mid-presentation and realized you need to slow down the script, but you’re stuck behind a podium? Or maybe you’re on a video call and don’t want to look away from the camera just to adjust your teleprompter? That’s where controlling your teleprompter from your phone actually changes how you present.
Your smartphone can become a wireless remote for your teleprompter through Bluetooth-paired apps. Both iOS and Android have solid options that let you adjust scroll speed and move through your script in real time—no keyboard needed. The signal travels wirelessly, so you’re free to move around and keep your eyes where they need to be.
Why this matters: When you’re not hunting for a keyboard or reaching for controls, you stay present. Your audience sees someone confident and focused, not distracted. You keep eye contact during interviews, video calls, and presentations. That’s the real win here.
Beyond phone apps, you’ve got other options too. Foot pedals work great if you’re stationary—think live streaming or podcast recording. Wireless presentation remotes give you even more flexibility. The point is, you get to pick whatever input method fits your setup.
Honestly, the best part is how adaptable this approach is. Whether you’re working solo, doing a broadcast, or presenting in a corporate setting, you can configure your controls however works best. Your primary display stays clear and focused on your audience. Your phone or remote stays in the background, doing its job without getting in the way.
Position Your Teleprompter for Perfect Eye Contact

Position Your Teleprompter for Perfect Eye Contact
Ever notice how some people on video calls seem to be looking right at you, while others stare off into space? That disconnect usually comes down to one thing: where they’ve placed their teleprompter.
Your teleprompter’s position makes a huge difference in whether you actually look at the camera or seem like you’re reading from somewhere else. If it’s too high, too low, or too far away, your audience will catch it. The trick is keeping that display at eye level—roughly 12 to 18 inches from your face—so the screen lines up with where your camera lens is.
Here’s why that matters: when your teleprompter is positioned correctly, your eyes only move a tiny bit to glance at the script and back to the camera. That minimal shift keeps your eye contact natural and connected. Your audience won’t feel like you’re looking through them or past them.
Try this setup:
- Mount the display just above or below the camera itself (ideally at the same height)
- Keep it close enough to read without squinting
- Adjust the angle so you’re looking straight ahead, not tilting your neck up or down
Frankly, mounting the screen too far above or below the lens creates a noticeable angle. Your eyes have to travel further, and that breaks the illusion of direct connection with your viewer.
For stable power and a clean setup, USB-C or HDMI connections work well. An adjustable monitor stand gives you flexibility to dial in the exact height and tilt that works for your space and camera setup. You might need to test a few positions before you find what feels natural.
The best part is that once you nail this, you won’t have to think about it anymore. Your eye contact will feel genuine because it actually is.
Use Multiple Displays With Your Teleprompter Setup
Use Multiple Displays With Your Teleprompter Setup
Tired of juggling your script, your participants’ faces, and your own video feed all on one screen? Yeah, that’s the real problem nobody talks about until you’re mid-call and squinting at tiny windows.
Once you get your main teleprompter positioned so you’re actually making eye contact with the camera, adding a second (or third) monitor is honestly the move that changes everything about how smoothly your calls run. You get to read your script, watch who you’re talking to, and check yourself on camera—all without turning your desk into a disaster zone.
The trick is using OBS software to layer everything strategically. Think of it like this: your script lives on one portable monitor off to the side, your participants show up on your main monitor so you can see their reactions, and your camera self-view sits somewhere you can glance at it without losing focus. OBS lets you overlay content from your main display right onto your teleprompter screen, so you’re not switching between windows constantly.
Here’s what actually works in practice:
- Dedicate one small portable monitor just for your script. Keep it close enough to read but off-camera.
- Route participant video feeds through your primary monitor. This keeps the conversation front and center in your mind.
- Use OBS to pull in your main display content onto the teleprompter itself. It creates a unified setup without extra clicking around.
The real benefit? Your teleprompter operations and your production controls stay completely separate. You can move windows, adjust layouts, and mess with settings without accidentally messing up what the camera’s seeing. Whether you’re doing a 30-minute video call or recording a longer session, your framing stays consistent.
So, why does having things organized this way matter? Because you can actually focus on *talking* instead of managing screens.
What kind of calls do you do most often—is it live meetings, recorded content, or a mix of both? That’ll help you figure out which display setup makes the most sense for your situation.
Budget Options: DIY Teleprompter vs. Premium Solutions
So you’re thinking about getting a teleprompter but don’t want to drop thousands of dollars? You’re not alone. Let me break down what I’ve learned about the DIY route versus buying the real deal.
The Money Talk****
The price gap is honestly wild. You can build a solid DIY setup with OBS software and a portable monitor for $150–$400. A professional teleprompter system? You’re looking at $1,500–$5,000 minimum. That’s a huge difference, and it matters if you’re just starting out or testing whether you actually need one.
The DIY approach works because you’re probably already sitting on the hardware you need. Free software like OBS does the heavy lifting, so you skip the premium price tag that comes with proprietary systems.
What You Trade Off****
Here’s where it gets real: premium units come with motorized scrolling, built-in lighting, and solid construction that lasts years. Budget setups don’t have that. You’re manually controlling the scroll or using an app on your phone to adjust it, which takes practice.
But here’s the thing—portable monitors work surprisingly well as teleprompters. You get clear text display at 1080p or even 4K, depending on what monitor and device you’re using. The picture quality? Totally fine for most creators.
The Real Question
So, why does this matter to you specifically? If you’re doing occasional videos or just starting, the DIY route buys you time to figure out if you even like teleprompter work. If you’re running a professional operation, you probably need something built to handle daily use.
Start cheap. Upgrade when you actually need to.
Troubleshoot Teleprompter Connection and Display Issues
So you’ve got your teleprompter setup ready to go, but nothing’s connecting properly. That’s frustrating—and honestly, it’s way more common than you’d think.
Most connection problems come down to a few basic culprits. Loose HDMI cables, incompatible adapters, or drivers that haven’t been updated in months are usually the first suspects. Why does this happen so often? Because cables get jostled around, and software updates slip your mind until something breaks.
Start by checking your physical connections. Make sure that HDMI cable isn’t just sitting there—push it in firmly on both ends. If you’re using an Apple Lightning Digital AV Adapter or a USB-C Multiport Adapter, verify it’s actually compatible with your gear. Wireless options sound convenient, but they’re honestly less reliable than a wired setup when you need things to work right now.
Power delivery matters too. Your portable monitor needs juice, and it should get that power from a dedicated port, not some shared connection splitting the load. A device starving for power will drop signal faster than you can troubleshoot it.
Try this: Restart both your main computer and your portable display, one at a time. Let them fully boot up before you reconnect anything. It sounds basic, but it works more often than you’d expect.
If that doesn’t fix it, display resolution mismatches between your devices might be the real problem. Your main monitor and portable display could be set to incompatible resolutions, which kills the signal. Jump into your system settings or OBS and manually adjust the resolution on both screens until they match. You might need to try a few different combinations before something clicks.
Still stuck? Test different cables and check the manufacturer’s website for driver updates. Sometimes the solution is just sitting there waiting for you to download it.
What’s your primary display setup—are you working with a laptop or a desktop tower?
Frequently Asked Questions
Can I Use My Old Monitor as a Teleprompter Display via HDMI Loopback?
Yes, you can absolutely repurpose your old monitor as a teleprompter through HDMI loopback. I’d recommend this cost-effective setup—it’s one of the HDMI loopback benefits that’ll save you money. You’ll get a dedicated display without buying expensive equipment for your old monitor setup.
What Resolution Should I Set for Optimal Text Readability on Portable Teleprompter Monitors?
I’d recommend you don’t shortchange your viewing experience—I suggest setting 1080p for ideal performance. You’ll find that adjusting your text size and screen brightness lets you read comfortably from distance while maintaining that professional presence you’re seeking during calls.
How Do Foot Pedals and Presentation Remotes Control Script Scrolling During Live Recordings?
I pair foot pedals or presentation remotes via Bluetooth to my teleprompter app, giving me hands-free scrolling control during live recordings. This remote usability lets me advance scripts naturally without touching my keyboard, maintaining professional camera presence throughout my solo content creation.
Are Teleprompter Apps Available for Both iOS and Android Devices?
Yes, I’ve found that teleprompter apps are available for both iOS and Android devices, offering excellent teleprompter compatibility across platforms. I’d recommend exploring options like Teleprompter Pro, which supports multiple device control and external display modes for your remote work needs.
Can I Display Video Call Participant Feeds While Reading My Script Simultaneously?
Yes, you can display participant feeds and your script simultaneously. I’d recommend using OBS to overlay your main display on the teleprompter monitor while running your calling app, giving you direct eye contact with both elements visible.


