As an Amazon Associate, we earn from qualifying purchases. Some links on this site are affiliate links at no extra cost to you. Our recommendations are based on thorough research and editorial judgment.
The Rise of Reference Monitors for Independent YouTube Filmmakers
Reference monitors have emerged as critical tools for independent YouTube filmmakers seeking objective color accuracy through waveform monitors, vectorscopes, and false color analysis. Basic field monitors range from $500–$1,500, while professional studio displays start at $3,000. For solo creators, calibrated laptops may suffice; however, serious color grading and multi-angle projects benefit considerably from hardware-calibrated reference displays. YouTube’s compression minimizes color discrepancies, yet consistent monitoring during post-production—which demands weeks of work—establishes the foundation for reliable creative decisions across viewing platforms. Exploring specific monitor selection criteria and calibration methods yields substantial workflow improvements.
Key Takeaways
- Reference monitors correct display discrepancies and ensure consistent color representation through hardware calibration for accurate editing.
- Field monitors ($500-$1,500) suit on-set work, while studio monitors ($3,000+) are better for color grading and post-production.
- Built-in tools like waveform monitors, vectorscopes, and false color provide objective measurement data for editing decisions.
- Independent filmmakers should prioritize editing monitors before investing in field monitors due to extended post-production timelines.
- For monitors under $2k, 24-inch IPS panels with 1080p resolution and 99% DCI-P3 coverage are recommended.
Do You Actually Need a Reference Monitor for YouTube?
Do You Actually Need a Reference Monitor for YouTube?
Here’s the real question: are you spending money on gear you don’t actually need, or are you leaving money on the table by skipping something essential?
The answer honestly depends on what you’re doing. If you’re making YouTube videos solo in your bedroom with a modest budget, you can absolutely get away with a calibrated laptop screen or a decent external monitor. Your videos will look fine. YouTube’s compression is aggressive anyway, so viewers aren’t going to see the tiny color shifts that keep colorists up at night.
But here’s where things get tricky. Once you start doing serious work—grading multiple scenes, matching colors across multiple camera angles, or pushing HDR—a standard display starts feeling like trying to edit photos with sunglasses on. You’re flying blind in certain ways.
The money part matters. A basic field monitor runs $500 to $1,500. Professional-grade editing displays? Try $3,000 and up. That’s real money for most creators.
Try this: ask yourself whether your audience can actually *see* what you’d be fixing with a reference monitor. If you’re uploading compressed videos to YouTube and your viewers are watching on phones and laptops, the platform’s algorithm cares way more about whether people click and watch all the way through than it does about whether your blacks are truly black.
Now, if you’re serious about broadcast work, experimenting with HDR, or trying to stand out in a crowded space, a reference monitor becomes worth the investment. You’ll catch exposure problems faster. You’ll know your colors actually match. You’ll spot details that cheaper monitors miss completely.
The best part is you don’t have to decide right now. Start with what you have, see where your workflow breaks down, and upgrade when you actually feel the pain. That’s how most successful creators do it anyway.
Field Monitors vs. Studio Monitors: Which Setup Fits Your Workflow?

So you’re trying to figure out whether to grab a field monitor or set up shop with a studio monitor. Truth is, it really depends on where you’re actually working and what you’re trying to do.
What Field Monitors Actually Do
If you’re shooting on set, a field monitor is basically your eyes in the sky. You get a portable screen you can mount on your camera rig or an arm, and it shows you exactly what’s happening in real time. Built-in tools like waveform and vectorscope displays help you nail exposure without guessing. The zebra patterns and false color indicators are especially useful—they’ll catch blown highlights or crushed blacks before you roll. Plus, you can monitor audio right there on the monitor itself, so you’re not juggling multiple pieces of gear.
The catch? Field monitors aren’t huge, and they’re not really built for pixel-peeping or color-critical work during post-production.
Studio Monitors: Where Precision Lives
Studio monitors are a different animal altogether. You’re looking at bigger screens, 4K UHD resolution, and serious color accuracy built in. Why does this matter? Because when you’re color grading or doing detailed retouching in software like Premiere Pro, you need to trust what you’re seeing. Many studio monitors let you store hardware calibration settings, so your colors stay consistent across sessions. They also handle HDR support properly, which is huge if you’re doing professional mastering work.
These aren’t moving. They’re sitting on your desk, and they expect you to work close to them.
The Real Difference
Here’s the thing—field monitors prioritize what you need *right now* on set: quick exposure checks, mobility, and audio feedback. Studio monitors care about what you need *later* in the edit suite: color precision, high contrast ratios, and extended viewing comfort for those long retouching sessions.
So Which One Do You Actually Need?
Honestly, a lot of people end up using both. You grab the field monitor for shoots, then switch to studio monitors when you sit down to grade. But if you’re just starting out and can only pick one, ask yourself: Am I shooting more often, or editing more often? That answer usually tells you everything.
Recommended Products

Built for Focus Pulling: Pixel-dense 4K production monitor for 1st AC's and focus pullers. Low-proflie design weighing only 6.8lbs makes monitoring in 4K more portable than ever.

Immaculate Color on Set or in the Suite: the best combination of premium color-accuracy and lightweight, set-ready portability you’ll find in any workflow.
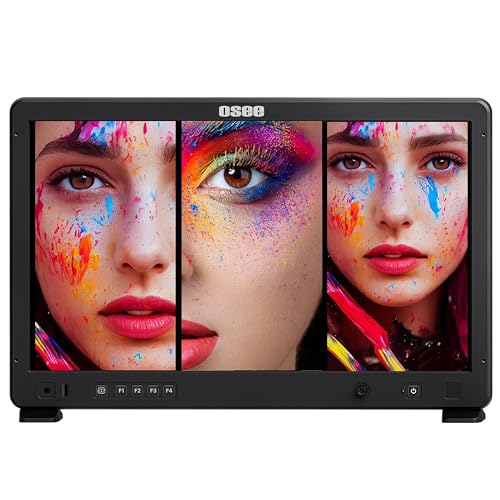
Horizontal and Vertical & Multiview Modes- Mega 22S4 can be set to single screen, dual screen, triple screen, quad screen, and PIP mode to meet different monitoring needs. Horizontal & Vertical VESA mount with quick rotation support helps you focus on your core content and unlock a new level of productivity. It supports multiple vertical split-screen modes (such as PIP / PBP), allowing you to connect and display multiple sources simultaneously.
How Reference Monitors Fix the Color Accuracy Problem

Ever notice how your videos look perfect on your computer but totally different on your phone or TV? That’s because your monitor isn’t showing you the truth. Standard displays have weak color ranges, uneven brightness, and zero calibration—so you’re basically editing blind.
Reference monitors fix this problem by actually storing color profiles on the monitor itself. Think of it like this: instead of guessing what your audience will see, you’re looking at exactly what they’ll get. The hardware calibration keeps colors locked in place, no matter the time of day or viewing angle.
So, why does this matter? Because one wrong color decision early on can ruin an entire project. Professional color spaces mean your reds stay red, your blacks stay black, and your skin tones don’t look like they’re from a zombie movie.
The real advantage shows up when you’re comparing shots side by side. Standard monitors hide details that reference monitors reveal instantly. You catch inconsistencies in brightness and color between clips that would otherwise slip through to your final product. Try this: load a difficult scene on both monitors and watch how much more you’ll catch on the reference display.
Built-in measurement tools (what pros call “scopes”) let you be objective instead of just trusting your eyes. You’re not guessing anymore—you’re reading actual data about what’s happening on screen.
Honestly, once you work with a reference monitor, it’s hard to go back. Your editing becomes faster, your color grading gets more precise, and you stop second-guessing yourself. That confidence alone makes a difference in your final work.
What’s one color decision in a recent project you wish you could redo?
Recommended Products

Featuring 8,192 levels of pressure sensitivity, 3 side switches, and the ability to customize by swapping the included grips or adjusting the weight and center of balance, the Wacom Pro Pen 3 is Wacom’s most advanced pen yet.

PREMIUM MONITOR: 4K UHD (3840x2160) advanced ergonomic, 60Hz IPS monitor deliver lifelike colors perfect for office, graphic design, photographers and more
Reference Monitor Scopes Explained: Waveform, Vectorscope, False Color

Reference Monitor Scopes Explained: Waveform, Vectorscope, False Color
Ever stared at your footage on screen and thought it looked perfect, only to have someone else say the colors look off? That’s where reference monitor scopes come in. Instead of relying on what your eyes tell you (which can be totally deceived by room lighting and fatigue), these tools show you the actual numbers behind your image.
The Waveform Monitor****
The waveform display is basically a graph of brightness levels across your shot. It shows you exactly where your image sits tonally—from the darkest blacks to the brightest whites. You’ll see any exposure problems right away: clipped highlights that are blown out, crushed shadows with no detail, or uneven lighting across the frame.
Think of it like this: your monitor might tell you something looks “bright enough,” but the waveform doesn’t lie. It’ll show you if you’re pushing levels into dangerous territory or leaving brightness on the table.
Understanding the Vectorscope
The vectorscope is your color cop. It’s a circular diagram that plots every color in your shot, showing you whether your hues are sitting where they should be and if your saturation levels make sense. Professional standards (like broadcast specs) are built right into the diagram, so you can see at a glance if you’re in compliance.
Try this: open your vectorscope while color-correcting. You’ll spot color casts instantly—like if your “neutral” skin tone is actually drifting too green or magenta. It’s way faster than squinting at your image and guessing.
False Color: The Quick Visual Check****
False color overlays take brightness information and assign different colors to different ranges. Overexposed areas might show up in red, underexposed areas in blue. It sounds weird, but it’s remarkably fast for spotting problem areas you might otherwise miss.
Honestly, this is the scope I reach for first when I need a quick sanity check on exposure. The visual feedback is immediate.
Putting It Together
So, why does combining all three matter? Because they catch different problems. The waveform handles luminance, the vectorscope handles color, and false color gives you a quick visual summary. You’re not depending on one tool—you’re cross-checking your work. That systematic approach means fewer color and exposure surprises down the line.
Use these scopes consistently, and you’ll notice your work holds up better across different displays and deliverables. What’s one scope you haven’t tried yet?
Choosing Your First Reference Monitor Under $2K

Choosing Your First Reference Monitor Under $2K
So you’ve decided a reference monitor is what your setup needs—now what? The tricky part isn’t finding *a* monitor; it’s finding the right one without blowing your budget. You’re looking at balancing a bunch of specs (resolution, color accuracy, contrast, HDR support) against real-world stuff like how much desk space you actually have and what cables your setup already uses.
Let’s talk size first. Most editing workstations use monitors between 21 and 27 inches, but honestly, 24 inches is the sweet spot. It fits on most desks without feeling cramped, and you’re not straining your neck to see the corners.
Here’s the thing about panel types: IPS and VA panels handle color differently. IPS panels give you better viewing angles and consistent color from the side—useful if you’re not always sitting directly in front of your screen. VA panels deliver punchier contrast but get weird if you’re not centered. Think about how you actually work before defaulting to one or the other.
Resolution matters, but maybe not as much as you think. Sure, 4K gives you more pixels to work with, but 1080p works fine for plenty of real-world projects. The bigger win? Making sure your monitor supports the color spaces you need. DCI-P3 and Rec.709 keep your work broadcast-ready. Without these profiles, you’re basically shooting in the dark.
Why does brand matter here? Frankly, companies like Atomos and BenQ have built solid reputations for delivering accurate color without charging $5K. You’re not paying for a famous name; you’re getting reliable performance.
Calibration ties everything together. Hardware profiling—using a colorimeter to measure and adjust your display—keeps your monitor accurate over time. It’s not a one-time thing; you’ll want to recalibrate every few months depending on how much you use the monitor.
Start by asking yourself: What’s your actual workflow, and what color accuracy do you really need? Once you answer that, the right monitor under $2K will be a lot easier to spot.
Recommended Products

PREMIUM MONITOR: 24 Inch 4K (3840x2160p) IPS Mac-ready monitor with 60Hz refresh rate
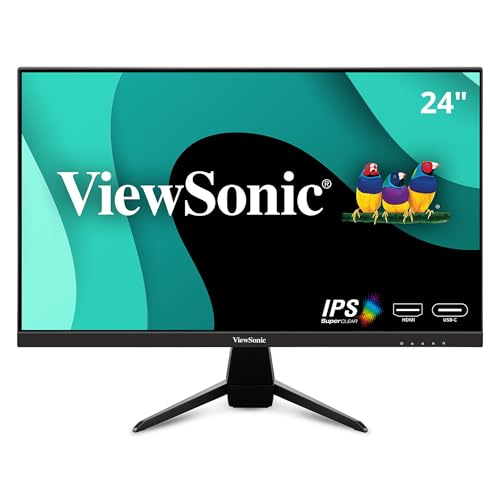
SEE THE DIFFERENCE: 24 Inch Full HD (1920x1080p) IPS gaming monitor with thin bezels

23.8" Full HD (1920 x 1080) Widescreen IPS Monitor with Adaptive-Sync Technology
Nearfield Monitor Setup: Building Your Color-Accurate Editing Station
You’ve picked out your monitor, but here’s what most people skip: actually putting it in the right spot. Get the placement wrong, and even the best screen won’t help you.
Nearfield monitors are great because they cut down on light bouncing around your room and messing with what you see on screen. You get better color accuracy and can spot details you’d miss otherwise, especially during those long editing marathons.
So, why does placement matter this much? Your eyes pick up colors differently depending on where you’re sitting. The sweet spot is creating an equilateral triangle—your monitor on one side, your eyes on the other, and equal distances all around. Aim for about 24-30 inches between you and the screen, with the display right at eye level. This setup keeps viewing angles consistent, makes brightness look the same across the whole screen, and stops reflections from ruining your color choices.
Here’s the trick: don’t just plop your monitor on a desk and call it done.
Take a few minutes to measure things out. You don’t need fancy equipment—use a ruler or even your arm span. Get the distance right, position it at eye level (you shouldn’t be tilting your head), and step back. Walk around a bit. Do the colors look stable from different angles, or do they shift? That tells you something.
Frankly, once you combine solid placement with proper calibration, you’ve built a real foundation for work you can actually trust. You’re not guessing anymore. Your edits will look the same on your screen as they do everywhere else.
Does your current setup pass the consistency test, or are you noticing color shifts depending on where you sit?
Recommended Products

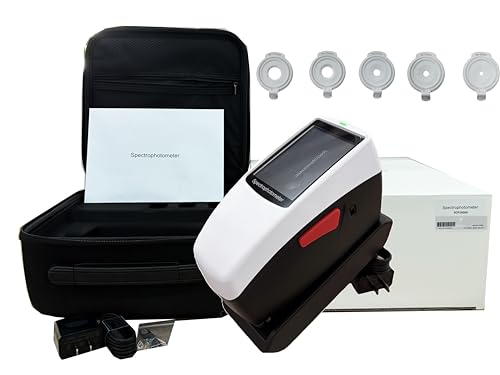
Get everything you need in one box, and start recording straight away

Get everything you need in one box, and start recording straight away

The smallest active studio reference monitoring system in the world, iLoud Micro Monitor provides you with ultra-accurate true linear frequency response with no coloration, and does so in every listening environment, especially in home and project studios. The iLoud Micro Monitors have internal DSP that offers various EQ settings for optimizing bass and treble response as well as position compensation — this lets you switch between a “free field” and “desktop” setup effortlessly.
Should You Buy an HDR-Capable Reference Monitor Now?
Should You Buy an HDR-Capable Reference Monitor Now?
So you’ve got your color grading setup dialed in, but now you’re wondering if you really need to drop thousands on an HDR monitor. Here’s the honest truth: most independent creators making YouTube content don’t actually need one yet.
The money factor is real. Entry-level HDR monitors run you $3,000 to $8,000, while solid standard reference monitors cost between $1,500 and $3,500. That’s a significant jump for gear that might sit unused depending on what you’re actually making.
Right now, YouTube doesn’t require HDR for the vast majority of content. Your typical vlog, tutorial, or indie documentary looks great on a standard color-accurate monitor. If you’re already crushing it with consistent color work on a quality non-HDR display, there’s no pressing reason to upgrade today.
That said, things are shifting. Streaming platforms like Netflix and Apple TV+ are slowly rolling out HDR support. If you’re grading content specifically for these platforms, or if you work on broadcast projects, then HDR capability becomes worth considering. But that’s a specific use case, not the norm for most solo creators.
Before you spend the money, ask yourself these questions:
- Are your clients or platforms actually requesting HDR work?
- Does your current monitor handle color grading well enough for your projects?
- Can you justify an extra $2,000+ in your budget right now?
Honestly, your best move is to stick with what works until HDR becomes standard practice in your type of work. A great standard reference monitor will serve you just fine for everything you’re probably making today.
Recommended Products

【Crystal Clear Images】1920×1080 resolution, 300cd/m² bright, 700:1 contrast ratio, viewing clearly and capture every detail to improve your shots

17.3 Inch Full HD (1920X1080) Resolution,High Brightness: 400cd/m2, High Contrast: 600:1, Response Time: 40ms, Viewing Angle: 80°/80°(L/R)60°/80°(U/D)
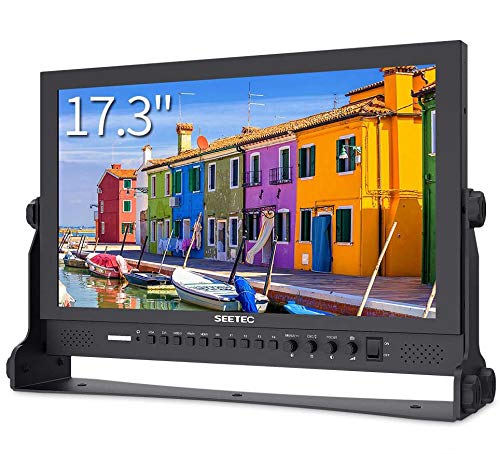
17.3 Inch IPS Full HD 1920x1080 Resolution, Brightness:400cd/m2, Contrast 600:1, Dot pitch:0.1989(H)×0.1989(V)mm, Aspect Ratio:16:9 Display Colors 16.7M
How to Calibrate Your Reference Monitor in 5 Steps
How to Calibrate Your Reference Monitor in 5 Steps
Ever wonder why your beautifully graded footage looks completely different on your client’s screen? That’s probably because your monitor isn’t actually showing you what you think it is. Calibrating your reference monitor fixes that problem by making sure the colors you see during editing match what everyone else will see, whether they’re watching on a phone, TV, or theater screen.
Let it warm up first. Before you do anything else, turn on your monitor and walk away for thirty minutes. I know that sounds weird, but your monitor’s internal electronics need time to stabilize, especially the color temperature output. You’re not being lazy—you’re being accurate.
Set your brightness to 100 nits. This is where most people trip up. You’ll want to use either your monitor’s built-in measurement tools or grab an external colorimeter if you’re serious about this. The point is simple: 100 nits is the standard for SDR content, and hitting that number keeps your grades consistent.
Next, dig into your monitor’s menu settings. Here’s the trick: set your color temperature to 6500K. That number matches D65 daylight, which is basically the industry standard. Why does this matter? Because everyone else is working with the same reference point, your work translates better across different projects and clients.
Now comes the color gamut calibration. You’ll use your monitor’s LUT implementation features to dial this in, then verify everything with waveform monitoring. This step makes sure the actual colors on screen match what you’re asking for.
Finally, save your hardware calibration profile directly to your monitor’s chip. Once it’s locked in there, you get consistent, reliable color every single time you sit down to work. No guessing, no surprises.
After you’ve gone through these steps, your grades won’t drift between sessions. That alone is worth the thirty minutes of setup time.
What Independent Filmmakers Are Actually Choosing (and Why)
What Independent Filmmakers Are Actually Choosing (and Why)
You’re sitting at your desk with a limited budget, trying to figure out where to spend your money on monitors. Should you drop cash on a fancy field monitor for set work, or invest in something better for editing? Most independent filmmakers I’ve talked to make the same choice, and honestly, it makes sense.
Here’s what’s actually happening: creators are putting their money into editing monitors first. They’re looking for 4K resolution, color accuracy that covers 99% DCI-P3, and the ability to calibrate the hardware themselves. Monitors like the BenQ SW240 or ASUS PA247CV keep showing up in these decisions because they nail the fundamentals—accurate panels and built-in scopes for color grading work.
Field monitors? They get added later, not first. And that’s intentional.
So, why does this matter? Because post-production is where most of your work actually happens. You’re spending weeks editing and color grading in your suite, not days on set. When you’re tight on cash, you need the monitor that’ll help you make better creative decisions in the grading room.
Try this approach: Start with a solid editing monitor that gives you trustworthy color information. That’s your foundation. Field monitors make sense once your projects get more complex—when you’re running multicamera setups or capturing ProRes Raw and hybrid log-gamma footage that demands real-time monitoring beyond what your camera’s viewfinder shows.
The best part is you don’t need everything at once. Build your toolkit step by step. Skip the expensive field monitor until you actually need to monitor multiple cameras or specialized codecs on set. Until then, your editing suite is doing the heavy lifting.
What kind of projects are you working on right now—are you still shooting single-camera, or are you thinking ahead to more complex productions?
Frequently Asked Questions
Can I Use a Reference Monitor With My Existing Editing Software Without Additional Purchases?
Yes, you can use a reference monitor with your existing editing software without additional purchases. Most monitors offer plug-and-play compatibility through HDMI or SDI connections, letting you enjoy reference monitor benefits like enhanced color accuracy and built-in scopes immediately.
How Often Should I Recalibrate My Reference Monitor for Consistent Color Accuracy?
I’d recommend recalibrating your reference monitor every three to six months for consistent accuracy. However, if you’re working in controlled environments with stable lighting, you might extend it to annually. Calibration frequency depends on your usage intensity and color-critical work demands.
What’s the Difference Between Hardware and Software Calibration for Reference Monitors?
I’ll show you the essential distinction: hardware calibration stores color profiles directly on your monitor’s chip—giving you permanent, accurate reference—while software calibration relies on your computer’s settings, which can shift and drift. Hardware benefits vastly outweigh software drawbacks for professional consistency.
Do Reference Monitors Require Special Cables or Connections Beyond Standard HDMI Inputs?
I’ll tell you that while HDMI works fine, I’ve found reference monitors offer multiple cable types and connection options beyond standard HDMI. You’ll likely encounter SDI, DisplayPort, and USB-C inputs depending on your specific monitor model’s capabilities.
How Does Monitor Room Lighting Affect Reference Monitor Accuracy and Viewing Results?
Have you considered how your editing space impacts color grading decisions? I’d say room lighting conditions dramatically affect your reference monitor’s accuracy. That’s why I recommend controlling ambient light and positioning your monitor away from direct sources—proper placement guarantees you’re seeing true colors, not reflections.


