As an Amazon Associate, we earn from qualifying purchases. Some links on this site are affiliate links at no extra cost to you. Our recommendations are based on thorough research and editorial judgment.
How macOS and Windows 11 Differ in Handling Super Ultrawide Resolutions
macOS struggles with ultrawide resolutions due to its Retina display architecture, which causes scaling artifacts and fuzzy text rendering lacking subpixel clarity. Windows 11 provides native ultrawide support with crisp text and consistent refresh rates matching hardware capabilities, whereas macOS caps SDR output at 95Hz and HDR at 60Hz. macOS requires third-party tools like BetterDisplay for custom resolutions, while Windows 11 offers built-in window snapping features. Understanding these technical differences reveals why ultrawide productivity varies considerably across platforms.
Key Takeaways
- macOS requires third-party tools like BetterDisplay for ultrawide support, while Windows 11 provides native ultrawide resolution handling without additional software.
- Windows maintains consistent refresh rates up to hardware limits, whereas macOS caps external displays at 95Hz SDR and 60Hz HDR.
- Windows preserves subpixel rendering for sharp text clarity on ultrawide displays; macOS lacks this, resulting in fuzzy character edges.
- Windows 11 includes built-in window snapping features for ultrawide productivity; macOS requires third-party tools for effective ultrawide window management.
- macOS ultrawide displays suffer scaling artifacts from Retina design; Windows provides crisp, proportionate interface elements across ultrawide resolutions natively.
Native Resolution Support: Why macOS Struggles With Ultrawide
Native Resolution Support: Why macOS Struggles With Ultrawide
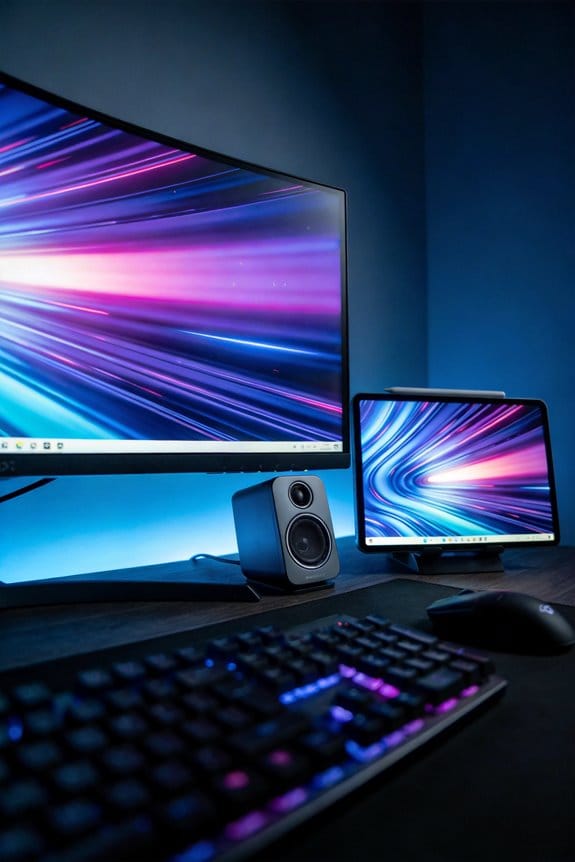
Got an ultrawide monitor sitting on your desk? If you’re on a Mac, you’ve probably already noticed something’s… off. Windows users with the same 3440×1440 display get crisp, native support right out of the box. Meanwhile, macOS treats it like a puzzle it doesn’t know how to solve, forcing weird scaling that makes everything look slightly wrong.
Here’s what’s actually happening behind the scenes. macOS was built around the idea of Retina displays—basically, the system renders everything at a super high resolution and then scales it down to fit your screen. Sounds smart on paper, right? The problem is that ultrawide monitors break this assumption. When macOS tries to apply its usual scaling tricks to ultrawide panels, you end up with interface elements that look disproportionate and text that feels fuzzy. It’s not your monitor’s fault. It’s the operating system’s design philosophy getting in the way.
This is where third-party tools come in. Apps like BetterDisplay, SwitchResX, and DisplayConfigX basically tell macOS, “Hey, I know you don’t support this resolution, but trust me on this one.” They work around macOS’s limitations by creating custom resolutions the system wouldn’t normally recognize. Take BetterDisplay as an example—it can optimize your 3440×1440 display down to around 2752×1152, and suddenly your ultrawide actually feels usable instead of frustrating.
So why does this matter? Because without these tools, you’re looking at a noticeably worse experience compared to the same hardware on Windows. Your interface becomes clunky. Your extended screen real estate isn’t as functional as it should be. You’re paying for premium hardware and not getting the full benefit.
The takeaway? If you’re committed to ultrawide on macOS, don’t settle for the native scaling mess. Grab one of these third-party solutions and actually enjoy your setup. Which one will you try first?
Recommended Products

Dual 14-inch High-Resolution Displays: Expand your workspace with two seamlessly connected 14-inch screens, each featuring a 2560 x 1600 2K resolution and a 16:10 aspect ratio, offering extra horizontal space for productivity and gaming with sharp, detailed visuals on a durable glass panel.

Kaisi 20 pcs opening pry tools kit for smart phone,laptop,computer tablet,electronics, apple watch, iPad, iPod, Macbook, computer, LCD screen, battery and more disassembly and repair

Ultra-Thin 0,1mm Professional Stainless Steel Curved Spudger Pry Blade Repair Opening Tool
Text Rendering: Windows Keeps Text Sharp, macOS Doesn’t

Text Rendering: Windows Keeps Text Sharp, macOS Doesn’t
Ever bought a beautiful ultrawide monitor only to realize the text on your screen looks fuzzy? That’s the real problem nobody talks about. Resolution numbers mean nothing if you’re squinting at blurry letters all day.
This is where macOS and Windows are completely different animals. macOS ditched subpixel rendering a while back, and honestly, it shows. Without this tech, text on standard displays just doesn’t look as crisp as it should. Windows kept subpixel rendering, which means sharper character edges and text that’s genuinely easier to read.
If you’re using macOS on a 4K display between 24-27 inches, you’ll probably spot jagged edges around letters. Windows doesn’t have this problem—the text stays sharp across those same screen sizes. Why? Because Windows prioritizes text clarity with rendering that actually works.
Linux with Wayland throws in another option. It delivers HiDPI text rendering that’s genuinely flawless, giving you clean fonts and excellent clarity even on larger displays.
Here’s the thing: tweaking display settings or font sizes inside your apps won’t save you on macOS. The problem runs deeper than that. macOS’s rendering architecture just doesn’t have the subpixel optimization that Windows built in.
Refresh Rates: macOS Instability vs. Windows Consistency

Refresh Rates: macOS Instability vs. Windows Consistency
If you’ve ever plugged a fancy 4K monitor into your Mac and wondered why it won’t run at the speed you paid for, you’re not alone. macOS slaps some pretty arbitrary limits on what your display can actually do—capping SDR output at 95Hz and HDR at 60Hz, while Windows just… lets things work normally.
I’ve dealt with this myself. Your Mac wakes up, and suddenly the refresh rate drops to 30Hz for no reason. Or it locks to some random setting depending on which monitor you connected first. It’s frustrating because the cable supports more bandwidth, your monitor supports more bandwidth, but macOS decides it knows better.
Think about high refresh rate monitors for a second. You grab a 1440p display that does 360Hz, and you’re ready to feel that buttery-smooth experience. On a Mac? Significant bandwidth limitations kick in and kill that dream.
Try this if you’re stuck with macOS: Downgrade to DisplayPort 1.2 and you might squeeze out 120Hz on 4K. It’s not ideal—you’re working around the problem instead of solving it. And honestly, this limitation applies whether you’re running Big Sur or the latest version. The arbitrary Hz limits stay in place regardless of what your cable can actually handle.
Windows, on the other hand, doesn’t play these games. Whether you’re using ultrawide monitors or standard 4K setups, Windows keeps your refresh rate stable and predictable. You set it to what your hardware supports, and it stays there.
Recommended Products

BRIGHTNESS BOOSTER MAX: The LG OLED evo shines even brighter than before. Brightness Booster Max technology magnifies each individual pixel for luminous quality that shines with every detail.

QD-MINI LED: This premium level Mini LED TV, now with the New TCL Halo Control System, ensures a stunning viewing experience.

NVIDIA Ada Lovelace Streaming Multiprocessors: Up to 2x performance and power efficiency
Window Management on macOS vs. Windows for Ultrawide Work

Thinking about ditching your dual monitors for an ultrawide? Here’s what you need to know before you make the leap.
Ultrawide monitors give you something dual setups can’t: one continuous stretch of screen real estate without those annoying bezels cutting through the middle. You get a smooth 3440 pixels of horizontal space to work with, which sounds amazing on paper. But here’s where things get tricky depending on what you’re running.
macOS users have to work harder.
Frankly, Apple doesn’t give you much out of the box for ultrawide window management. You can fit three or four windows across the display without them overlapping, sure, but getting them positioned exactly where you want them? That takes manual tweaking. Most people end up using accessibility settings or keyboard shortcuts to move windows around, which is honestly more friction than it should be.
If you’re on a Mac, you’ll likely need third-party tools to make your ultrawide actually feel productive. It’s not ideal, but it’s doable.
Windows 11 handles this differently—and better.
Windows comes with built-in snapping features that understand ultrawide space. The system divides your screen into zones, and you can snap windows into place without any extra software. Want two windows side-by-side? Three windows across? It just works. Try using Windows Key + arrow keys to snap windows, and you’ll see what I mean. The best part is you’re not hunting for additional apps or fighting with settings.
So why does this matter? If window management is central to your workflow, the OS you choose makes a real difference.
The bottom line: Windows handles ultrawide productivity right away. macOS requires workarounds. Pick based on what you actually use every day—not just what sounds better in theory.
Recommended Products

49 inches ultrawide 32: 9 dual QHD (5120 X 1440) Display

38” Curved UltraWide QHD+ (3840 x 1600_ IPS Display.Mounting Type:Wall Mountable 100 x 100 mm

Stunning FHD IPS Touch Display: Equipped with a 1920×1080 IPS screen, 178° ultra-wide viewing angle, 450 cd/㎡ high brightness, and 10-point capacitive touch. Delivers vivid visuals and responsive interaction even in bright indoor environments.
Restore Your Display: macOS Tools to Fix Ultrawide Problems

Restore Your Display: macOS Tools to Fix Ultrawide Problems
Got a fancy ultrawide monitor sitting on your desk, but your Mac can’t seem to figure out how to display it properly? You’re not alone. Windows 11 makes ultrawide displays look effortless, but if you’re on macOS, you’ve probably noticed scaling artifacts, weird resolution options, or text that looks fuzzy. Frankly, it’s frustrating.
The core issue is simple: macOS doesn’t play nice with ultrawide resolutions out of the box. Your 3440×1440 monitor either gets squished, stretched, or displays at resolutions that make everything look blurry. That’s where third-party tools come in.
BetterDisplay is probably the easiest fix. It lets you set custom resolutions that macOS refuses to acknowledge on its own. For a 3440×1440 ultrawide, you can optimize it to 2752×1152, which actually makes text sharper and gives UI elements proper sizing. It’s not magic—it’s just what native macOS controls should’ve done already.
If you want more flexibility, consider these alternatives:
- DisplayConfigX gives you resolution management options beyond what’s hiding in System Preferences
- SwitchResX is the power user’s choice, letting you tweak display settings with precision that feels almost surgical
So, why does this matter? Because productivity on an ultrawide should mean more screen real estate to work with, not fighting your operating system just to make it usable. These tools actually get you there.
The real kicker is that none of this should be necessary. But until Apple decides to fix their ultrawide support, these third-party solutions are your best bet for actually enjoying that monitor.
Have you tried any display management tools on your Mac, or are you still dealing with the blur?
Recommended Products

The 240Hz OLED Smart Gaming Monitor that’s Ahead of the (800R) Curve - The 34” WQHD OLED with a steep 800R curve and 1300-nit peak brightness pulls you deep into the action, while a 240Hz refresh rate and 0.03ms response time keep gameplay insanely fast and smooth. Plus, LG’s webOS lets you stream your favorites and cloud game—all from one epic screen.

【Instantly Create a Triple Monitor Setup, Boost Productivity by 300%】Stop juggling tabs on a single screen! Ladomi 16" laptop screen extender instantly transforms your laptop into an immersive triple-monitor workstation. Perfect for coding, trading, multi-tasking, or design work, our monitor extender allows you to seamlessly research on the left, work in the center, and communicate on the right—dramatically streamlining your workflow for remote work, business travel, and creative projects.

SeeSii Upgraded TinySA Ultra:This New Version V0.4.6.1 Spectrum Analyzer is developed by Hugen, with 4.0 inch 480 x 320 large touchscreen display, 100kHz to 5.4GHz widely measure range, with the new ESD protection function, the product has a higher anti-static level and a longer service life, and built-in 32Gb micro SD card, can directly record data to the card ,which is convenient for your data sharing and storage
Frequently Asked Questions
Does Betterdisplay Work Better Than Switchresx for 3440X1440 Ultrawide Optimization?
I’d argue BetterDisplay absolutely dominates for your 3440×1440 needs. It fixes DPI issues brilliantly, offering custom resolutions like 2752×1152 that SwitchResX can’t match. While SwitchResX provides superior control generally, BetterDisplay’s ultrawide optimization is unbeatable.
What Monitor Settings Prevent Improper Resolution Display on macOS Ultrawides?
You’ll want to set your monitor to Progressive mode rather than Interlaced in resolution settings. I’d also recommend checking monitor calibration adjustments to guarantee you’re getting proper display output on your ultrawide setup.
Can Linux Wayland Handle Ultrawide Scaling Better Than macOS or Windows?
I’ve found that Linux Wayland handles ultrawide scaling remarkably well—better than macOS, actually. You’ll discover KDE’s fractional scaling works flawlessly with ultrawide applications, eliminating the scaling issues that plague macOS. Linux resolutions adapt beautifully without the artifacts you’d encounter elsewhere.
Why Does macOS Randomly Lock Displays to 30HZ After Wake-Up Events?
I’d say macOS randomly locks your display refresh to 30Hz after wake-up issues because the system doesn’t properly re-negotiate bandwidth with your monitor. It’s a known bug where Big Sur and later enforce strict Hz limits regardless of your cable’s actual capabilities.
How Many Windows Can Productively Fit on a macOS Ultrawide Simultaneously?
I’ve found you can productively fit three or four windows simultaneously on a macOS ultrawide, which dramatically boosts your multitasking efficiency. The seamless ultrawide space eliminates monitor gaps, enabling superior window organization compared to traditional dual-monitor setups.


